Microsoft Teams is a campus alternative to Zoom for online meetings. Along with being able to host online meetings and webinars (all for free with up to 1,000 participants), Teams offers many more robust collaboration abilities and tools.
However, if you are new to Teams and are wondering how to do the many online meeting functions Zoom has, we have created a FAQ to help with your migration of utilizing Teams.
-
- Open Microsoft Teams from your taskbar, start menu, or desktop
- Click on Calendar on the right rail
- Click on New meeting
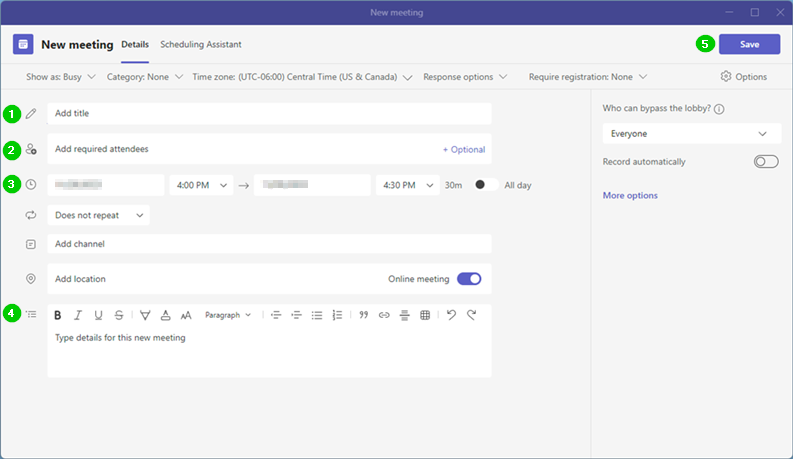
- In the window that pops up, enter in a name for the meeting in the Add title box, type in the names of the participants in the Add required attendees box, select your date and time, and put in the description and/or agenda of the meeting in the Type details for this new meeting box. Finally, click Save.
-
- Open Outlook
- Click on the Calendar icon
- Create a meeting as you normally would
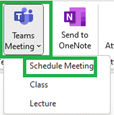
- Click on the Teams Meeting button in the Ribbon and then Schedule Meeting
-
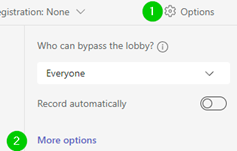
- When creating a meeting in the Teams client, you can click on Options and then More options
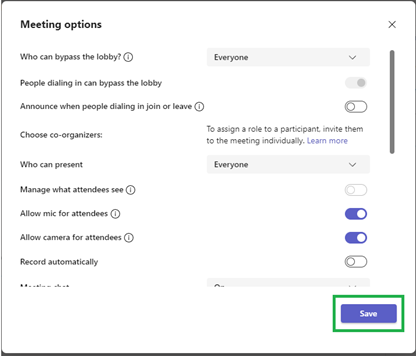
- This will show you all the options available. When finished click Save
- You can also make these changes after you have created the meeting, by editing the meeting.
- When creating a meeting in the Teams client, you can click on Options and then More options
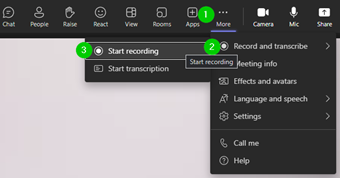
- During the Teams meeting, click on More, then Record and transcribe, and then Start recording
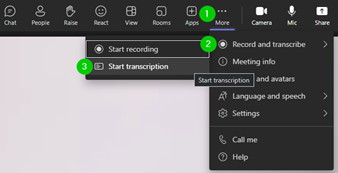
- During a Teams meeting, click on More, then Record and transcribe, and then Start transcription
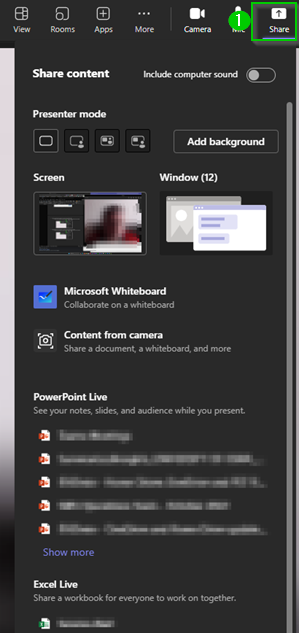
- During a Teams meeting click the Share button and then select from the options available
