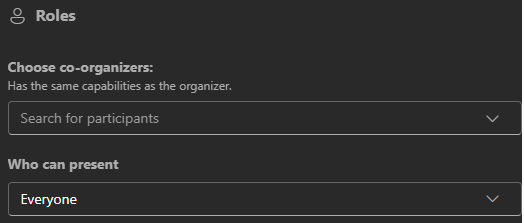
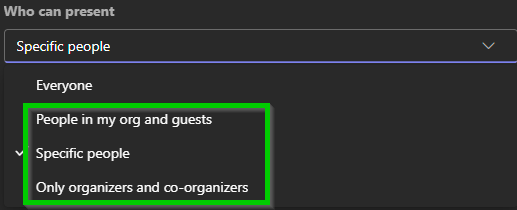
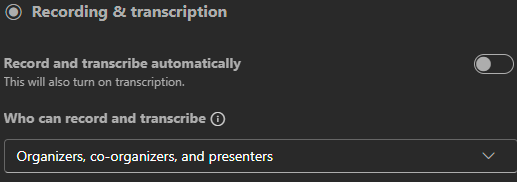
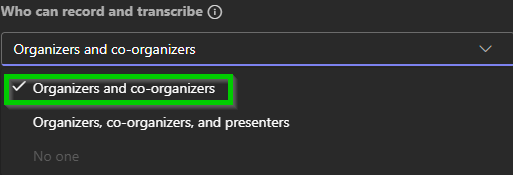
Online meetings can be a source of stress when faced with bad actors or bots that you were not expecting to see. This can happen for all online meetings, including Teams and Zoom (for Zoom, please visit: Securing Zoom Meetings).

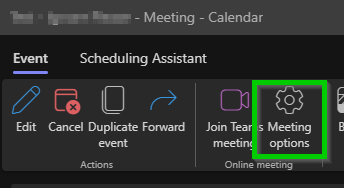
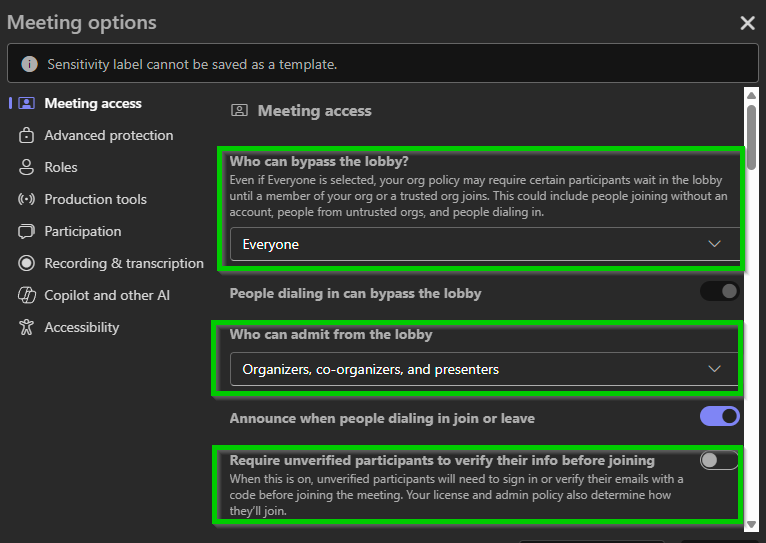
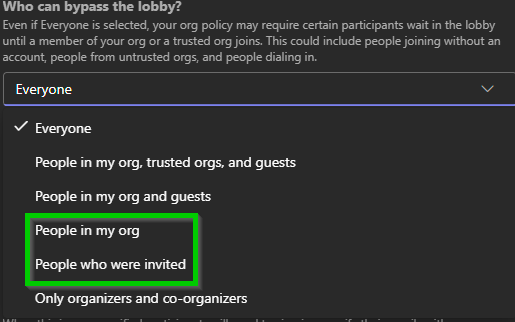
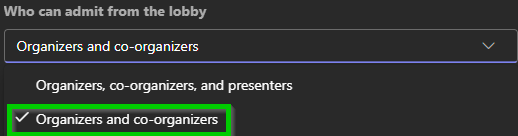
Below are recommendations on how to secure your Teams meetings from unexpected guests or potentially unwanted bots.

Prevent Uninvited Participants From Joining Your Meeting

  1. In Teams, open up your calendar and create your meeting or edit an existing Teams meeting.
  2. Click on Meeting options.

    Meeting Options
  3. You will have the following options presented for who can bypass the lobby, who can admit people from the lobby, and if you want to verify someone outside of the University (external guests).

    Initial meeting option choices
  4. From the  Who can bypass the lobby? drop down, we recommend either People in my org or People who were invited.

    Who can bypass the lobby choices
  5. Next, from the Who can admit from the lobby drop down, we recommend Organizers and co-organizers.

    Who can admit from the lobby selection
  6. Finally, we recommend turning on the option to verify if a participant outside of the University is indeed who they are. This is done by enabling Require unverified participants to verify their info before joining. The participant will receive an email that they are using with a passcode that they will have to enter before joining the meeting.

    Require unverified partipants to verify

Participant Options

The following shows the options you can choose from on limiting participant interactions during the meetings. Turning off mics or cameras or not allowing chat can help limit unexpected interruptions.

  • Participant interaction options

Setting Participant Roles

For your meeting, you can set others to help manage and set options, set who can present, and who can choose to record and turn on transcription (this is separate from closed captions and is a running transcription of the meeting).

  1. In the meeting Roles section, you can choose your co-organizers who can help you run the meeting and change options and who can present.

    Roles available
  2. From the Choose co-organizers drop down, type in the names of the individuals you would like to promote to help running the meeting (full control including changing meeting options).

    Choose your co-organizers
  3. From the Who can present drop down, we recommend picking People in my org and guests, Specific people, or Only organizers and co-organizers. Each one is more restrictive than the next. Participants can be promoted to the Presenter role as needed during the meeting and changed back to a standard participant.

    Who can present during your meeting
  4. Finally, in the Recording & transcription section, you can set the meeting to automatically record and transcribe or you can pick who can click record and enable transcription. We recommend setting this to Organizers and co-organizers.

    Recording and transcription options
    Who can record and transcribe

Restrict Who Can Access Recordings, Transcriptions, and Limit Copying and Forwarding of the Meeting Chat and Transcription

  1. To limit who can access your recording or transcription of the meeting after you have finished your meeting, you can go to the Recording & transcription section and then click on Who has access to the recording or transcript drop down. We recommend setting this to Organizer and co-organizers.

    Who has access to the recording and transcript after the meeting
  2. To not allow the forwarding or copying of the meeting chat or transcript, go to the Advanced protection section in the Meeting options the click the toggle switch on next to Turn off copying and forwarding of meeting chat and transcripts.

    Turn off copying and forwarding of chat or transcripts
Last updated
Article number
9966