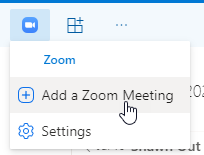
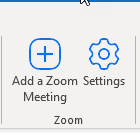
The Zoom for Outlook add-in is designed to manage scheduling within the Outlook on the web and desktop apps and is automatically installed for all eligible faculty, staff, and student employee accounts. The add-in allows you to easily add a Zoom meeting to any new or existing calendar event.
Please follow directions below for your device. Additional details are available on the Zoom website at https://support.zoom.us/hc/en-us/articles/4406055170317.
- Log in to Outlook on the web using your HawkID and HawkID password
- Select the Outlook icon
- Select the Calendar icon
- In the top-left, click the New Event button
- Enter the meeting details (date, time, attendees, etc.)
- In the menu bar, click the Zoom icon and choose Add a Zoom Meeting
- Zoom will prompt to ask permission to display a new window. Choose Allow
- A HawkID login window will open. Log in with your HawkID and password
- Zoom meeting information will be added to your calendar appointment
- Open Outlook
- Select Calendar
- Create a new appointment
- In the toolbar, click Add a Zoom Meeting
- A HawkID login window will open. Log in with your HawkID and password
- Zoom meeting information will be added to your calendar appointment
- Open Outlook
- Select Calendar
- Create a new appointment
- In the toolbar, click Add a Zoom Meeting
- A HawkID login window will open. Log in with your HawkID and password
- Zoom meeting information will be added to your calendar appointment
- Open the Outlook app
- Select Calendar
-
Create a new appointment by clicking the + button
- Enter the meeting details (date, time, attendees, etc.)
- Choose the online meeting provider
- For iOS, tap the Meeting Provider field and choose Zoom
- For Android, tap Online Meeting and choose Zoom
- A HawkID login window will open. Log in with your HawkID and password.
- Just below the Location field, tap the toggle next to Zoom
- Zoom meeting information will be added to your calendar appointment