The Remote Desktop application comes pre-installed on any Windows computer and can be installed on a macOS computer to allow you to remote into a Windows computer. These instructions will walk you through setting up and verifying a Windows computer is ready to be connected to from the Remote Desktop application.
- Click on the start button (Windows Key)
- Click on the gear wheel (Settings)
- Click on System
- Scroll down and select Remote Desktop
- Verify "Enable Remote Desktop" is set to On
- If you do not have administrative rights on your computer please contact your local IT support staff person to help toggle this option
- Next click on Advanced Settings
- Verify that "Require computers to use Network Level Authentication to connect (recommended)" is checked
- If you do not have administrative rights on your computer please contact your local IT support staff person to help checkmark this option
Your Remote Desktop client is ready to receive remote desktop sessions.
- Click on the start button (Windows Key):
- Click on the gear wheel (Settings):
- Click on Network & Internet:
- Click on Windows Firewall:
- Click on Allow an app through firewall:
- Scroll down the list and look for Remote Desktop:
- You may see 2 or more Remote Desktop options.
- Look for the one that has a "Yes" in the Group Policy column and make sure that Domain is at least checked:
- If Private and or Public is also checked that is okay. You just want to make sure Domain is checked at a minimum
- If Domain is not checked please contact your local IT support consultant to fix this for you
- If you do not see a "Remote Desktop" item with a "No" in the Group Policy column and you are a local administrator on your computer you can check the Domain box yourself to enable the correct firewall rules to allow remote desktop connections. Otherwise contact your local IT support consultant to help you check the box.
- Look for the one that has a "Yes" in the Group Policy column and make sure that Domain is at least checked:
Your firewall is ready for remote desktop sessions.
Items to check:
- If you are a local administrator on your work computer you are good to go.
- If you are not a local administrator on your work computer you will want to check the following setting(s):
- Right-Click on the Start Button (Windows Key).
- Click on Computer Management.
- Type in your current logged in users password (this does not require Administrative Privileges).
- Expand the Local Users and Groups option under System Tools.
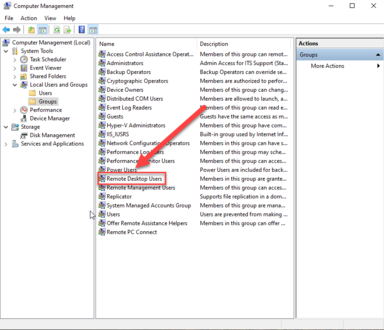
- Click on Groups.
- Look for Remote PC Connect.
- If you see Remote PC Connect double click on it and see if your HawkID is listed there.
- If it is there you are good to go.
- If it is not there do the following.
- Click on the Start Button (Windows Key).
- Scroll and find the Microsoft Endpoint Configuration Manager folder and expand it.
- If you do not see "Microsoft Endpoint Configuration Manager" folder look for a "Microsoft System Center" folder.
- Click on Software Center application.
- Click on the Options tab.
- Checkmark the "I regularly use this computer to do my work" option (This sets you as a Primary User for a computer).
- You have just enabled your user to connect remotely.
- Click on the Start Button (Windows Key).
- If you do not see "Remote PC Connect" look for "Remote Desktop Users" and double click on it.
- If you see your HawkID listed you are good to go.
- If you do not see your HawkID listed please contact your local IT support consultant.
- If you see Remote PC Connect double click on it and see if your HawkID is listed there.
- Right-Click on the Start Button (Windows Key).
You HawkID is now setup to remotely login to your work computer
- Login to PowerUp (must be connected to the VPN first) and verify that you see your work computers computer name on the list of computers you can wake up
- If you see your work computer listed put your work computer to sleep by doing the following
- Click on the Start Button (Windows Key)
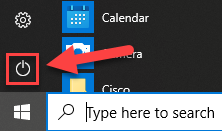
- Click on the Power Button
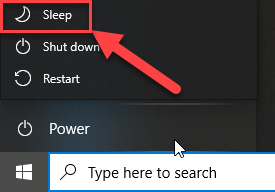
- Click on the Sleep button
- Now attempt to remotely wake it up by using a fellow staff or faculty members computer with the following steps
- Log in to PowerUp
- Check your computer to see if it woke up
- If it woke up you are good to go
- If it did not please contact your local IT support consultant
- Click on the Start Button (Windows Key)
- If you do not see your work computer do the following or contact your local IT support consultant for help
- Click on the Start Button (Windows Key)
- Scroll and find the Microsoft Endpoint Configuration Manager folder and expand it
- If you do not see "Microsoft Endpoint Configuration Manager" folder look for a "Microsoft System Center" folder
- Click on Software Center application
- Click on the Options tab
- Checkmark the "I regularly use this computer to do my work" option (This sets you as a Primary User for a computer)
- Wait approximately 30 minutes and check PowerUp again.
- If you still do not see it contact your local IT support consultant
- Click on the Start Button (Windows Key)
- If you see your work computer listed put your work computer to sleep by doing the following
Follow the instructions on our support guide Connect to Your Computer using Remote Desktop to make sure you are correctly configured.