Signatures, templates and stationery files are all commonly used features of Outlook. They can make composing messages easier using standard text for frequently sent messages and change the appearance of your background when sending a message.


Using Signatures

Using a signature can make all of your messages consistent with how you sign them and provides the recipient with your contact information. 

You may also want to use signatures if you repeatedly send the same message text.  A signature can be a template for messages you send so you don't have to retype the same text over and over. 

To create an institutional signature showing your affiliation with the University of Iowa, see Email Signatures for information.

Creating a New Signature

Outlook for Windows (Classic)

  1. Choose File | Options | Mail and click on the Signatures button.
  2. Click the New button on the Signatures and Stationery window.
  3. Enter a name for your new signature (e.g., "invite") and click OK.
  4. Enter your text in the Edit signature text box. This will be the text that will not change. Note: You must set default signatures for new messages and replies/forwards – it can be “none”
  5. Click the OK button to return to the Options menu.
  6. Click the OK button to close the Options menu.

Outlook for Mac (New and Legacy)

  1. Click Outlook (on the upper left) | Preferences | Signatures
  2. Click the "+" at the bottom left of the screen to add a new signature
  3. Type the name of the signature in the Edit signature name box
  4. Click in the box to type the text of the signature
  5. Select your preference using the down arrow in the For New Messages: box
  6. Select your preference using the down arrow in the For Replies/Forwards: box 
  7. Click Save (disk icon)

Outlook for Windows (New) and Outlook on the web (OWA)

  1. Login to Outlook on the web
  2. Click Outlook
  3. Click Settings (gear icon)
  4. Choose Accounts
  5. Choose Signatures
  6. In the Email Signature box, click the + New Signature link
  7. Type the name of the signature in the Edit signature name box
  8. Click in the box to type the text of the signature
  9. Select your preference using the down arrow in the For New Messages: box
  10. Select your preference using the down arrow in the For Replies/Forwards: box 
  11. Click Save.

Sending a Message Using a Signature

Outlook for Windows

  1. Create a new message or reply to an existing message.
  2. Click down arrow of Signature icon
  3. Select the signature you wish to use and edit the text as needed.
  4. Click the Send button to send the message.

Outlook for Mac

  1. Create a new message or reply to an existing message.
  2. Click the Signature dropdown icon that is to the right of the picture icon on the taskbar. 
  3. Choose which signature you wish to send
  4. Click the Send button. 

Outlook on the web

If you didn't select "Automatically include my signature in messages I send" when you created the signature, do the following:

  1. Create a new message or reply to an existing message.
  2. Click the signature icon and select Outlook Web Signature (or the name you gave your signature)
  3. Click the Send button. 


See Create and add a signature to messages for more information. 


Using Stationery Files in Outlook

Stationery in Outlook is designed more for creating a "wallpaper background" for your messages. Keep in mind that when you create a message using stationery, it creates a larger message that is may be unreadable by some email applications.

Creating a Stationery File

Outlook for Windows (Classic)

  1. Choose File | Options | Mail, click on the Stationery and Fonts button.
  2. Select the Personal Stationery tab.
  3. Click the Theme button to create a theme or stationery for new HTML e-mail messages. 
stationery file settings
  1. Choose a Theme and click OK.
  2. Click OK again.

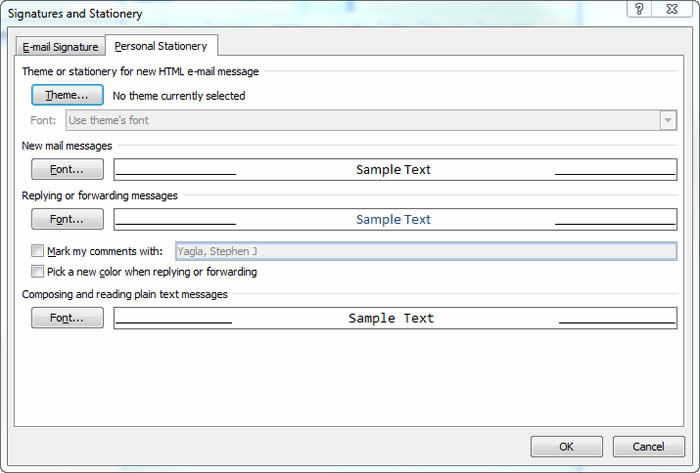
This stationery file will be the default for new HTML messages.

Use a one-time stationery file to send a message

Outlook for Windows (Classic)

  1. Select New Items | Email Message Using | More Stationery.
  2. Choose any Theme from the list and click OK.
  3. Type the text of your message and send when finished. 

For more information see: 

Create stationery for email messages

Apply stationery, backgrounds, or themes to email messages

Using Templates in Outlook

If you find that you repeatedly send the same message, you may want to create a new template. You can create a template containing any information which will remain constant, save the template, and then use the template to send a new message.

Creating a Template

Outlook for Windows (Classic)

  1. Click the New Email button to create a new message.
  2. Type the information for the template (e.g., all the standard information).
  3. Click File and choose Save as. Specify the template File name and Save as file type Outlook Template (.oft). Be sure to save it in the default location for Microsoft Templates.
  4. Close the message and do not save it when prompted.

Outlook for Windows (New) and Outlook for the web (OWA), Outlook for Mac (New and Legacy)

  1. Click the New Mail button to create a new message.
  2. Click the My Templates (Outlook for Mac Legacy - choose View Templates) icon.
  3. Click on  + Template
  4. Type a Template Name and the text of the body of the template (e.g., all the standard information).
  5. Click Save.

Using a Template You've Created to Send a Message

Outlook for Windows (Classic)

  1. Choose New Items | More Items| Choose Form.
  2. In the “Look In:” box, select User Templates in File System
  3. Select the form you wish to use and click Open
  4. You can now type the needed information and click Send.

Outlook for Windows (New) and Outlook on the web (OWA), Outlook for Mac (New and Legacy)

  1. Click the New Mail button to create a new message.
  2. Click the My Templates (Outlook for Mac Legacy - choose View Templates) icon 
  3. Click on the Template you created and it will appear in the body of the new message.
  4. Make any needed changes and click Send

For more information see:

Create an email message template

Automate common or repetitive tasks with Quick steps in Outlook

Last updated
Article number
7876