Configuring Audio Devices in Skype for Business (Windows)
When using Skype for Business your client may default to the incorrect audio device. To set your default audio device please perform the following steps for the correct operating system:
1. In the Skype for Business client, click on the gear icon on the top right of the window to open the Skype for Business options window.

2. Click on Audio Device on the left side of the window.
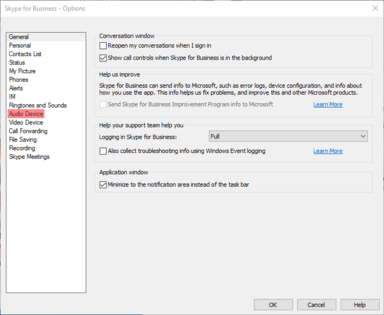
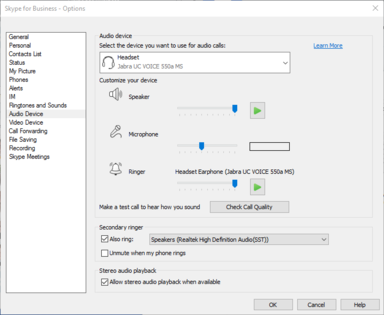
3. On the Audio Device page, you will see many options for configuring your audio device settings. To set your default audio device, please click on the drop down menu located under “Select the device you want to use for audio calls.”

4. Select the audio device that you would like to use:

5. When completed, you will see your desired audio device that you want to use for calls:
Configuring Audio Devices in Skype for Business (Mac)
When using Skype for Business, your client may default to the incorrect audio device. To set your default audio device please perform the following steps for the correct operating system.
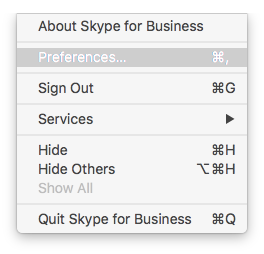
1. With the Skype for Business client open, click on Skype for Business in your taskbar:
2. On the drop down menu, click on Preferences:
3. The preferences window will open, click on Audio/Video:

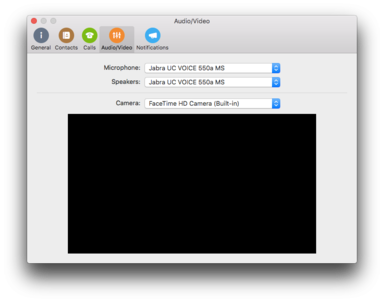
4. You will now see the Audio/Video preferences window:

5. Click on the drop down menus next to Microphone and Speakers to set your default device to your desired audio device:

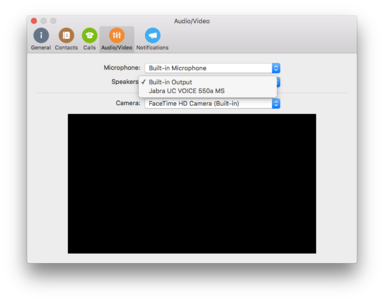
6. Once completed, you will now see your desired audio device as your default audio device for making Skype for Business calls:
Controlling Notifications and Ringing (Windows)
Troubleshooting Audio Issues in Skype for Business
Checking Skype for Business Setting
Ensure your Skype for Business device is selected as your default Skype for Business audio device:
- Open your Skype for Business client.
- Select the Down Arrow to the right of the configuration /setup wheel.
- Select Tools and then Audio Device Settings.
- Ensure your Skype for Business device is selected as the device to use for audio calls.
Check your Skype for Business device volume:
- Check and test the volume settings for your Skype for Business device (speaker, microphone and ringer) by adjusting the appropriate slider buttons and pressing the green arrow to test your settings.
- Ensure the Mute button on the Skype for Business device is not depressed.
- Select the Check Call Quality button and follow the directions to see how you sound to others.
Note: If you still have problems with your Skype for Business audio, follow the steps below to check your Windows settings.
Checking Windows Settings
Ensure your Skype for Business device is selected as your default Windows sound device:
- Open the Control Panel, then open the Sound applet.
- Select the Playback tab, and then select your Skype for Business device, select the Set Default button and then Apply.
- Select the Properties button, then the Levels tab, then adjust the output (volume) slider as necessary.
- Select Apply then OK.
- Select the Communications tab, then select Mute all other sounds or Reduce the volume of the other sounds by 80%.
- Then select OK to close the Sound applet.
Check your Windows sounds settings:
- Select the sound icon on the task bar in the system tray area, and ensure the volume slider is set to an adequate level.
- Ensure that speaker icon under the slider does not have a red icon indicating it is muted.
Note: Users with hearing problems should consider a Skype for Business device that includes integrated volume controls.