This support article pertains to the SiteNow v1 platform. Click here for SiteNow v2 documentation.
Note: This guide is for users who wish to place a SiteNow content pane on the page, or a reusable custom content pane. To create and place a single-use custom content pane, see Creating and editing single-use custom content panes.
Placing a content pane on a page
- Navigate to the page where you wish to place the content pane.
Note: If you would like to change the layout of this page before placing the content pane, see Changing the layout of a page before continuing. - Click the 'Customize this page' button at the bottom on the page.
- A blue 'Content' box should appear somewhere near the top of the page. Click the plus button inside of this box.

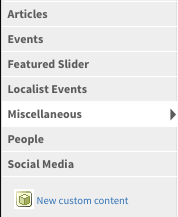
- Look for the desired category on the left side of the resulting page. If you are placing a reusable custom content pane, this may be either "Miscellaneous" or the arbitrary category you assigned to the content pane while creating it.

- Click on the name of the pane you wish to place.

- The content pane will appear under the light blue box.
- To configure display settings, click on the gear icon in the gray header of the content pane. The display options available depend on the type of content pane you are using.

- To place the content pane in another location on the same page, click and drag the four-arrow symbol in the gray header of the content pane and move the pane to its new location.

- To configure display settings, click on the gear icon in the gray header of the content pane. The display options available depend on the type of content pane you are using.
- Click 'Save' at the bottom of the screen to save the content pane and its configuration.